Showing posts with label DIY. Show all posts

Thursday, 10 October 2013

Dyeing Wool Fabric

The unsightly pink hues of various garments on my washing line are an aberration.  And, in my opinion, an abomination.  


Every time I glance out the window and catch the sight of the pinky glow I feel a little schizophrenic.  There's is no way those clothes could belong to anyone in my house.  Alas, the stinky pink is evidence of my not quite successful fabric dyeing attempts.

Quite a while ago I was given a large bag of baby/toddler clothing hand me downs, much of which was pink.  Some of the offending items were of good quality and nicely made/styled, so I decided to keep them for dyeing later on.

I finally got around to dyeing the pink pile with red Teri dye (I was given than also), and the result wasn't red but fuchsia.  There wasn't anything wrong with the dye, but it wasn't the right chemicals for the cellulose blends.  I foolishly failed to notice that the jars said very clearly "for wool and silk".  My next attempt was a grey and pink woollen poncho and a navy jersey, both of which absorbed the dye well.  They will both need to go through another dyeing cycle because the dye solution was partly exhausted by the unfortunate cotton intrusion.

I now need to get my hands on some dye that works well on cotton, like Procion.  Something that is not Dylon.  Damn you, diabolical Dylon.  I've used their fabric dyes in the past, years ago, and on numerous occasions.  They were sold in tiny tins that dyed 250g of fabric for $3.  Now they've "rebranded", changed their packaging to sachets, and the same amount of dye costs $7.  What a rip off! They downsized their wide range of reds in preference of the unpleasantly pinkish Tulip Red.  They have clearly opted for style over substance.
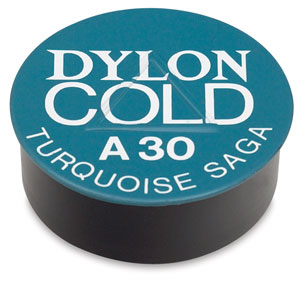
The old Dylon packaging
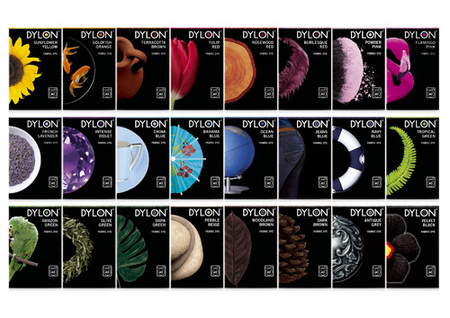
The new Dylon

Thursday, 12 September 2013

Kids' Bean Bag With Pockets Tutorial


Bean bags aren't cheap to buy, but they are easy to make.  If you have old curtains or sheets that need a new life, a bean bag is a worthwhile project to make use of them.  It's a pretty straight forward, though somewhat dull construction process.  There are lots of long, straight seams, and metres of material to manage, but it's not much effort to add details that break the making monotony.
Made from a curtain
Now I don't usually do things on a whim.  I'm what one would call "pretty boring".  Spontaneous isn't my style.  So I'm still scratching my head about how I managed to have a bag of polystyrene beans mere hours after deciding that Zaika was in need of a bean bag.

Even a hoarder like me didn't have the filling taking up some valueless underbed space. We had to pay for the beans.  With money.  Crap.  My extensive experience as a reluctant, nocturnal bean bag assessor in my student days told me that the super-static, ever spilling styro-beans were by far superior to any other forms of filling, such as foam, soft toys and styro-packaging.
Styro beans
There was no way my frugal brain would let me buy fabric in addition to the beans.  That would make the project more expensive than buying the beanbag itself.  No worries, I have piles of material.  I needed fabric that was large enough and strong enough for the project.  I turned to my Ugghhh box.  It's the stash of pretty unappealing fabrics that I  keep just in case they will come in handy for prototyping, etc.  The Ugghhh box is full of ugly fabric ducklings.  I figured that the bean bag was a good opportunity to use up some of my crap fabric.

It didn't take long to find what I was looking for: old curtains.  The textile was the epitome of boring.  Myth Busters proved that you can, indeed, polish a turd, so I decided to test my turd polishing skills with this skull numbingly dull fabric. Still, at least you can add to dull.  You can't take away from garish.  It's like ignorance vs stupidity: one is fixable.
Outer curtain fabric in some non-descript grey hue and a brown stretch canvas liner fabric

Project supplies:
  • about 2.5m of strong, breathable liner fabric (like a bed sheet)
  • about 2.5m of strong, breathable, easy to wash outer fabric (like an old curtain)
  • 35-40l of filler beans
  • strong thread
  • 2 x 46cm locking zips (they can only be pulled open when the zip tab is lifted up).  Alternatively you can remove the tabs with pliers, permanently and use a paper clip to open the zip whenever you need to remove the cover for washing
  • Velcro or domes for the zip flap
  • paper, ruler and pencil for drawing the pattern
I found a free pattern here and chuckled at the 90's style instructional photography.  The tutorial is pretty passable, but I made a few adjustments that are worthy of note.

Firstly I added a couple of Grimly adorned side pockets.  Ok, they aren't terrifically useful, but they do take the attention away from the fabric.  In the case of this bean bag, less was never going to be more.  To make pockets, you need to attach them to the panels before joining the panels together.  For the pocket pattern, I cut/folded the panel pattern in half, which gave me perfectly matching seams.
Two panels with pockets sewn on before assembly of the panels.
A more important adjustment was creating a secure zip closure.  If you're making a bean bag for a little person, it's really not a good idea to let the styro beans spill everywhere.  It's essential to make sure that sneaky little hands can't get into the beans.  Locking zips (or tabless zips) help, but I opted for an additional security flap on the outer bag.  An integrated flap is the easiest option, as well as the most refined one.  However, I didn't get fed the idea until the zip was already sewn in, so I attached a separately sewn flap.

1. Cut a strip of fabric 10cm wide x 46 cm long.  Fold in half lenghtwise and press flat.  Sew over one of the zip seams with the raw edges facing the zip.

2.  Fold the flap over the zip and press
 

3. Top stitch over the fold.  The stitching should be overlapping or be close to the zip seam.

 4. Sew on Velcro or add domes to the flap.


This was the reason for making the bag
The bag was milk-stained within a week
The pocket is superficially useful after all
Additional construction and design notes:
  • Don't skip the top stitching on any of the seams.  The seams will be much weaker without it.
  • Press all the seams for the same reason.  This was boring even for me.
  • You will have to occasionally remove the cover for washing.   I would imagine that attempts at getting the bean-filled liner back inside the cover will make you swear profusely.  If I were to make a bean bag of this style again, I would either include a longer zip in one of the side seams or sew the zip around the bottom circle panel and make that panel zip off completely.
 

Saturday, 31 August 2013

Baby Tights With Monster Bum and Feet

The Monster Bum tights were a hit, and the new footed version triples the terror.

The cool thing about Monster Bums is that you can make the monster face as scary as you like because it's not like babies get to see their butts.  Whether it's a zombie with bleeding eye sockets, the terrifying shark from Jaws or Vladimir Putin's face, the baby will be utterly oblivious to the derriere dread.  You can check out the tutorial for monster bum making here
Blik the Bat and his monster friends on bums and feet
I wouldn't go over the top with anything bloodcurdling for the footed Monster Tights because babies get to see their feet.  They are fascinated by those little wiggly extremities!  It's hard not to envy the incredible display of hip flexibility required for all the toe sucking.  Babies seem revel in showing off their yogic prowess.  I guess the Happy Baby pose is a pretty apt observation.

After I made a pile of monster bum tights for Zaika, adding monster feet to the next lot seemed like an obvious progression.  I sewed the feet using a double layer of fabric both for extra warmth and to keep the potentially scratchy embroidery off baby skin.  Here's a pretty simple tutorial for sewing footed tights

Dressed in her new pants for the first time Zaika abandoned her toys and spent an impressive amount of time conversing with the googly-eyed monsters on her feet.  I think she tried to eat them at one point.  Good to know that she can stand up for herself.

Baby tights with embroidered monster bum and monster feet


All the tights are made from merino, merino/cotton or super-soft merino/modal blends.  Those textiles are awesome to work with!
Baby tights with embroidered monster bum and monster feet
Blik the Bat bum
Baby tights with embroidered monster bum and monster feet
Blik the Bat feet
Baby tights with embroidered monster bum and monster feet
Pixie the Piggy bum
Baby tights with embroidered monster bum and monster feet
merino cotton blend
Baby tights with embroidered monster bum and monster feet

Wednesday, 31 July 2013

Domesticated Manufacturing Techniques

"In House is the documentation of making a collection of pieces using domesticated manufacturing techniques. It uses the architecture, appliances and materials found within my small home to create an even smaller factory. I have replicated processes such as rotational casting by using the washing machine, brake pressing using the door and steam bending using the microwave, with the language of the objects defined by these parameters" - David Steiner 


In House from David Steiner on Vimeo.

This is lovely.  I am especially impressed by the transformation of the blender into a lathe and the reminder about using doors as right angle benders. David Steiner is clearly confident with various manufacturing techniques to  be able to pull this off with such simple elegance.  The DIY rotormoulder is wicked!  That would work well for candle wax and chocolate.  Delicious chocolate.  Now I keep looking around the house and visualising the various items that can be destroyed *ahem* transformed.
Cutlery and bottle opener: pewter cast in cereal box moulds

Friday, 19 April 2013

Reversible Baby Sunhat Tutorial

Slip, slop, slap and wrap - a sunhat is a sun-smart summer necessity.
Red and white reversible sunhat and a matching sunsuit (adapted from made-by-rae)
We had an unusually long, hot summer.  The baby took a while to figure out this new sensation of warmth and bare feet, and I went on an arduous mission to locate some baby friendly fabric for making summer clothing.  

The first garment I made was a sunsuit, following a very simple tutorial on made-by-rae.  I made a few changes to the design for a nicer fit and to better suit the very lightweight cotton fabric:
  • elasticated shoulder straps, so they don't need to be crossed
  • extra lines of shirring on the bodice
  • french side seams
  • stay tape inside the crotch closure to make it stronger
The left over fabric was perfect size for a sunhat!

I don't have a pattern.  I doodled it rather roughly.  However, there's a lovely bonnet pattern from Prudent Baby.

You will need:
  • lightweight cotton material in two colours (about 0.3m each)
  • thread
  • dome or button

1. Cut out the pattern twice from each fabric.  I underlined the white cotton because it was too see-through. That is the weird stitching you see on the white fabric.
Left, centre back, right, brim, neck tie
2.  Stitch together left and right sides of each layer, then attach the centre back piece.  It's best to leave the top seam open to reduce bulk.  Trim and clip seams before pressing with a hot (provided there's no synthetic fibre) steamy iron. 
Sew each layer separately
Trim and clip seams and press thoroughly.

3.  Stitch together the two layers of the brim, leaving the bottom edge open.  Trim, clip, turn right way out and press.

Here's where I had a design hiccup.  After gathering the brim and attaching it to the hat, I realised that it was way too floppy and completely out of proportion!
Floppy brim
I decided that gathers were unnecessary, so I changed the size of the brim.
Changing brim size
4. Turn the hat inside out, so that the seams are on the outside.  Sandwich the nicely pressed brim between the two hat layersThe whole brim will now be hidden inside the hat.  Don't forget to match the layers: i.e the red side of the brim should face the red layer of the hat, and the white side of the brim should face the white layer.  Stitch all the way across.
The gathers are from the V1.0 floppy brim.  There are no gathers with the small brim
5. Turn the hat the right way out through the open neck seam and press the brim seam.
Red side of the hat: all nicely pressed
 
 6.  Now there's an open, loose seam to take care of.  Using the longest stitch and no back stitching, sew all the way along it to keep the fabric layers from shifting when you attach the neck band.  This stitch will also be your guide when attaching the neck band.  You may want to use contrasting thread to make it easier to pull out once the hat is completed.

7.  Sew together one of the long sides of the neck band using the longest stitch and no back stitching.  If you now open this seam and press, you'll get a crease, which will be your seam allowance pressing guide a couple of steps later. 

8.   Don't remove the pressing stitch just yet.  First, sew together the remaining three sides of the neck band.

Note the crease line - this is a pressing guide
 9.  Remove the pressing stitch and turn the neck band the right way out.  Now, using the crease as the guide, you can turn the seam allowance inside the band and press.

Nicely pressed neck band
10.  The penultimate step is attaching the neck band to the hat.  Simply slot in the neck seam of the hat into the open seam of the neck band.  Use the stitching line in step 6 as your guide to line up with the folded edge of the band and sew from one end of the band to the other.  Press the seam.


11.  Attach fastening: button + button hole, snaps, domes.  I have a thing for doming, so I went with that (photos above)
 
12.  Laugh at your baby looking silly in a new hat.


Tuesday, 26 March 2013

'71 MGB Race Car Clock


The making of an analogue time piece.
A bit over a year ago we rather ambitiously went on a frenzied but rewarding mission making everyone's Christmas presents.  I managed to document some of the projects in a timely manner, but lost steam half way through, letting the process photos gather the digital equivalent of dust and cobwebs.  Perhaps, it's time to unearth another one of those undertakings.

One gift I didn’t have to think hard about for a clock for my other half.  Well, there was a lot of thinking involved, but that involved resolving the design details as opposed to coming up with the concept.  We have a garage/workshop, which is my husband’s greasy second home.  He didn’t have a clock and couldn’t get his phone out of his pocket with filthy hands to check the time, so there were frequent issues with punctuality, especially around dinner time.  I set out to resolve this persistent concern with something of design significance to this wonderful man: his 1971 MGB race car.
MGB in action.  Photo taken by some race meeting photographer
I had the design finalised by mid November and cut the first prototype.  I gleefully patted myself on the back for being so organised with the whole Christmas whatsitnow.  The plywood clock face had the design engraved into it, and then the design was cut separately out of card and inlaid into the wood recess.  It worked perfectly, so I sent the files to the fabricator to have the inlay components cut out of brass.  After not hearing back from them for a few weeks, I got slightly anxious and called them, only to be told that they couldn’t cut brass and that they had emailed me about the issue.  The email must have been eaten by the internets because I never received it.  I really wanted the vintage look of brass, but by then it was too late to find another fabricator, so I made the decision to use stainless steel instead.  At least that would match the chrome of the car.
Plywood and card mock up.  The card pieces fit perfectly into the laser engraving in the plywood
I firmly decided to avoid a last minute mad making panic A La Design School, so I forcefully crossed my fingers in hope of getting my parts back on time.  I couldn’t work on any other components until the metal parts arrived, so when I was told ten days before the deadline that my files were unreadable (despite being especially converted for industrial CAD cutters), I developed a persistent twitch to accompany my morning sickness.  What followed was a series of phone conversations with the fabricator where I had to convince them that the design was to be cut exactly as specified – I’d already prototyped it, and it worked, and no extra bridges were needed.  Yes, yes Cut As Is, Please I Know What I'm Doing scenario.

Finally, on the 21st of December, at the end of the work day, I had the parts personally delivered by the lovely factory manager.  I gave him tasty jam to say "thank you".  
Thank You jam
I spent the next morning frantically and painstakingly grinding off the unavoidable bridges between the laser piercing points to get my parts out of the unyielding sheet.  I wished I had a Dremmel and not a gutless little rotary tool.  Anyone who’s worked with stainless steel is familiar with its pervasive attribute for eliciting coarse language.  After much swearing, sweating and bleeding I had all the metal bits separated and laid out.  Fortunately, the parts turned out about 95% accurate to the design, which meant only minor tweaking of the original drawing to get the engraving of the clock face identical to the unchangeable stainless components.
Grinding off waste material
Steel parts ready for cleaning
Next came the inlay prep work.  Firstly, when you laser cut wood, you can't just grab the cut part and expect it to be good enough for a product.  I see those examples in the market place all the time, and it bugs the hell out of me.   A laser beams is basically a very concentrated fire.  It burns.  Intensely.  People seem to be surprised by that.  The heat causes charring on the material surface, in the direction of the pull of the extraction.  Quite a bit of sanding is required to tidy up the laser cut parts.
Sanding the clock  face


After all that grind, it was time for some serious effort to inlay the springy, shiny steel parts into the engraving without making a mess.  Getting the intricate MG cut-out to stay flat was remarkably difficult and incredibly frustrating.
Gluing in the metal parts
Oh the terrible glue mess!
Painstaking sanding the glue off the plywood without scratching the metal
Tidied inlay
Next step is sealing the clock to make sure that the wood lasts well.  I  decided on a spray lacquer.  Unfortunately I couldn't get into a ventilated paint booth, so had to do the spraying outdoors, at the mercy of Wellington wind.
Deciding between a wax and a lacquer.  Wax and metal should have been quite obviously a dumb idea.
Spray lacquering in a mostly sheltered alleyway.  The back clock panel is thick enough to accommodate the mechanism
I was on the receiving end of some suspicious looks from people who must have mistaken me for a tagging delinquent.  Several lacquer coats later the clock face was ready for its pointy hands.  I bought a cheap clock mechanism and swapped its paper thin aluminium hands for my custom cut ones.  Two days before Christmas the clock was finally complete and ready to be packaged into an insanely beautiful box made from some cardboard scrap.  
Nothing beats a brown cardboard box
Leather MGB gift tag
The clock has been a functional workshop feature ever since.


Related Posts Plugin for WordPress, Blogger...