As the saying goes, you get what you pay for, so don't expect a glorious photographic masterpiece when using an online printing service. Fortunately, there are a few steps you can take to get a result that won't make you recoil in disgust. Not using Comic Sans is a given, but there are other tricks.
To commemorate Zaika's first year of life I decided to print a book of the year's photos and digitised keepsakes. Back in the analogue days these were called "scrap books" and contained everything from photos to hair clippings to hand prints to possibly dried smears of stool samples.
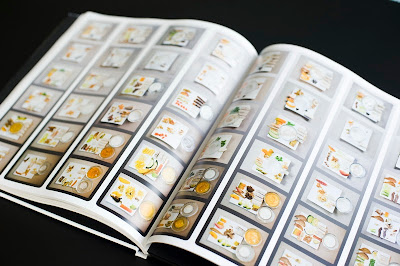
Nearly a hundred pages, three hundred photos and over two hundred hours of image processing later I had a print ready tome. It should not have taken nearly four months to complete, but I'm an overzealous pedant when it comes to a balance of chronology and visual flow, and the book was like an all consuming gigantic puzzle that threatened my precarious sanity.
 |
| Back cover: one year of damned formula spoons |
If I wasn't a bum with no income and could afford to use a professional printing service, all those hours of digital toil would have resulted in a lovely InDesign document where all the images were precisely formatted and aligned with beautifully positioned text in a tidy inoffensive font. I would be able to use this lovely InDesign document to print numerous copies of the book for the grandparents. And if our house burnt down, I would reprint the book from my precious offsite back up hard drive. The print quality would be excellent, with superb detail, vibrant, true to file colour and crisp text.
Alas, because I am a bum with pretty much no income, the above "if" is wishful thinking. Instead I had to settle for a daily deal for an online printing service at about a third of the price of a traditional book. After all, beggars can't be choosers. I've printed this way on a couple of prior occasions, and I was aware that the layout software offered by these online services is pretty limited, the text is basic, and that the prints come out nearly 1/2 stop darker. I processed all images to optimise the workflow taking into account these software limitations. The pedantic pixel management that this required took a hell of a lot of time. Then I uploaded the processed photos to discover that the software has been "updated" to even shittier functionality. I swore a lot and proceeded to work around this mess.
How to make the most of the deficient online book printing services after the jump:
So what are the limitations (and workarounds)?
- There is no way to accurately resize your images. There are no rulers, no % scaling (the latter had been an option previously). Each subsequent image you select from your library is automatically dropped into the centre of the right page and is scaled down by an unspecified factor. It's pretty much impossible to then resize the images to exact measurements. I uploaded all my image files into the online software at their exact print size and resolution (300dpi). However the software completely ignored those metrics and generously upsized the photos to what would have been as low as 150dpi, which isn't good enough for photo printing.
 |
| Umm, the photos are meant to be the same size, and certainly not as large as the one at the back. |
- The only way to counteract the seemingly random auto scaling is to drag each image from the
right page to the left as soon as it's dropped. When the next image is
then dropped into the blank right page, it's not automatically scaled
down.
- Have your image files correctly sized for printing, so that you can at least make a visual assessment regarding their scale accuracy on screen. For example if you want a 10cm square photo, you need to crop it to 10cm x 10cm x 300dpi before uploading. You can also work in pixels, for optimum precision. Here's a useful guide for optimising images for printing. Photoshop has a visual equivalent of a spell check in the form of a Print Size button, which is part of the Zoom and Hand tool functions
.
- There is no way to accurately align your images. There are no align tools, no guides, no zoom function. Unless you're happy with a very casual layout, the only workaround is to lay out your page in Photoshop or some such, save the correctly sized file as a jpeg for printing and import that jpeg into this blasted online book maker. Angry face. It's a good idea to make a digital mock up of the book using PowerPoint. It's a very efficient way of trying different layouts and image options.
 |
Layouts like these are too precise for this software and have to be created in something like Photoshop and then uploaded
|
- Transparent layers are not supported, as only jpegs can be uploaded. This means that any graphic or photo that's a shape other than a square or a rectangle has to be uploaded as part of a laid out page. Pages below are examples of these.
- There is no full bleed option, so if you want a photo to take up the whole page, you either have to have a thin border around it or scale it up to extend past the page edges and lose a little bit around the photo perimeter.
 |
| In order to get an image to print to the edges of the page it needs to be scaled up to extend beyond the page perimeter |
 |
| The photo on the right page has a thin border around it instead of being full bleed |
- Text is hard to work with: There are few fonts, the sizing isn't in standard units, and there are no alignment options. Unfortunately if you want text in your book, you just have to grit your teeth, make a grimace that communicates utmost distaste and bite the proverbial bullet. Trying to add text via an imported jpeg is not something I would dare try. Jpeg isn't a suitable file format for anything with text. Professional printing services would use .tiff files which render text to a high, crisp resolution. More on file formats on this site.
 |
| Ugly, ugly, hideous text positioning. At least the baby's less of an eye sore. |
So what's the verdict?
In addition to the obtuse software, the print quality is pretty average. The images printed nearly 1/2 stop darker and considerably cooler. The latter poorly affected the feel of some of the photos. It was also very disappointing to see ghosting around the text - like a fuzzy pixel shadow surrounding each letter.
 |
| Left hand image is meant to be greyscale. It is certainly not. The photos on the right page should be warm and glowing, but instead they are cold and clinical. |
I'd say that these online printing services are perfectly adequate for casually designed books that aren't concerned with exacting layouts or fancy text, and where the reader/viewer won't notice a slight tonal and colour deviation in print. You wouldn't make one for a designer or photographer. They would cry into their pile of negatives.


No comments:
Post a Comment